

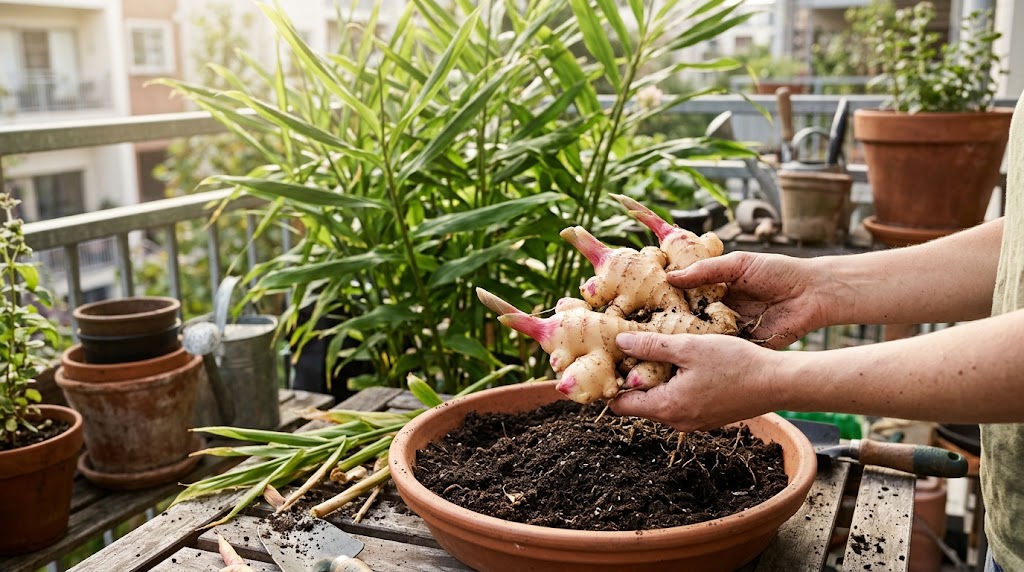
If you want to harvest spicy, juicy knobs of organic ginger right from a shaded patio corner, learning how to grow ginger in balcony containers is an easy, high-reward project.
When I first started gardening on an apartment balcony, I assumed root crops were completely out of reach. My patio was covered by a deep building overhang and received only filtered, indirect ambient light. Most gardening guides insist that edible crops require eight hours of blazing direct sunlight. Furthermore, store-bought supermarket ginger always felt fibrous, dry, and woody, having traveled in refrigerated cargo containers for weeks and often treated with growth-retardant chemicals to prevent sprouting on grocery shelves.
Then I learned the true botanical nature of culinary ginger (Zingiber officinale).
Ginger is not a desert crop; it is a tropical rainforest understory perennial that evolved beneath dense, humid jungle canopies. Ginger actually despises scorching midday sun, which bleaches and burns its delicate leaves. It thrives in warm, sheltered, bright indirect shade—the exact conditions found on covered apartment balconies!
Even better, homegrown ginger harvested young (called “baby ginger”) is completely different from grocery store ginger. Baby ginger has tender, paper-thin, translucent pink skins, zero stringy fibers, and a sweet, juicy, citrusy heat so delicate you don’t even have to peel it before cooking.
According to tropical crop research from the University of Florida IFAS Extension, containerized ginger produces high rhizome yields in warm, shaded microclimates with loose, well-aerated potting media, making shallow patio planters an exceptionally productive growing environment.
Here is your complete, bookmark-worthy guide on how to grow ginger in balcony containers.
Why Choosing to Grow Ginger in Balcony Containers Works So Well
Unlike deep-rooted vegetables that require massive, heavy containers, ginger rhizomes grow horizontally just below the soil surface.
Taking the time to grow ginger in balcony containers allows apartment gardeners to utilize wide, shallow planters that save floor weight, provides lush bamboo-like ornamental foliage that looks gorgeous on patio tables, and allows you to snip fresh, fragrant green leaves year-round for homemade herbal teas.
Preview unavailable
Selecting the Best Rhizomes to Grow Ginger in Balcony Containers
Your harvest success begins with the quality of your starter ginger root (rhizome):
1. Certified Organic Seed Ginger (The Gold Standard)
Purchasing certified organic seed ginger from an online nursery or seed company guarantees disease-free rhizomes that have never been sprayed with synthetic chemical sprout inhibitors. Look for plump, firm rhizomes with smooth, tight skin and visible, rounded “growth buds” (often called “eyes,” resembling potato eyes).
2. Sprouting Organic Supermarket Ginger
If you buy ginger from the grocery store, always choose certified organic roots. Non-organic ginger is routinely sprayed with chlorpropham, a chemical growth inhibitor designed to stop eyes from sprouting on store shelves.
- The Warm Water Soak: Soak supermarket ginger in a bowl of warm water for 24 hours before planting. This leaches away any residual chemical inhibitors and rehydrates the internal plant tissue.
- Look for rhizomes with greenish-white growth buds beginning to swell at the tips of the “fingers.”
5 Easy & Proven Steps to Grow Ginger in Balcony Containers
Follow these 5 practical steps to plant, care for, and harvest fresh gourmet ginger on your apartment patio.
Step 1: Pre-Sprout Rhizomes Indoors in Late Winter
Ginger has a long growing season (8 to 10 months to reach full maturity). Starting indoors in February or March gives your plants an essential head start:
- Break your seed ginger into 2- to 3-inch chunks, ensuring each piece has at least two healthy, swollen growth eyes.
- Allow the cut chunks to sit on your kitchen counter for 24 to 48 hours to form a dry, protective callous over the raw cuts, preventing soil rot.
- Place the rhizomes in a shallow tray filled with damp seed-starting mix, barely covering them with 1/2 inch of soil.
- Keep the tray warm (75°F to 80°F / 24°C to 27°C) using a seedling heat mat or on top of a refrigerator. Within 2 to 3 weeks, vibrant green cone-shaped shoots will emerge.
Step 2: Choose Wide, Shallow Containers
To grow ginger in balcony containers successfully, pot shape matters more than pot depth:
- The Horizontal Growth Rule: Ginger rhizomes expand sideways across the container, not straight down. Choose wide, shallow planters (such as 14- to 18-inch wide rectangular trough boxes, shallow terracotta bowls, or 7- to 10-gallon fabric grow bags) that are 8 to 10 inches deep.
- Explore fabric container designs in 10 Best Grow Bags for Balcony Vegetables.
- Ensure the container has multiple bottom drainage holes to prevent waterlogging.
Step 3: Plant Rhizomes Horizontally with Eyes Pointing Up
Potting mix texture is crucial for rhizome expansion:
- Fill your container with 4 inches of a rich, loose, well-draining potting blend. Mix 50% coconut coir, 30% organic compost, and 20% coarse perlite. Review our soil recipes in 10 Best Potting Soil for Balcony Vegetables.
- Lay your sprouted ginger pieces horizontally flat on top of the soil, spacing them 6 to 8 inches apart.
- Position the green sprouting “eyes” pointing upward toward the sky.
- Cover the rhizomes with 1 to 2 inches of potting mix and water gently.
Step 4: Provide Warmth, Humidity, and Filtered Ambient Shade
When moving containers out to your apartment balcony in late spring (once outdoor night temperatures stay reliably above 55°F / 13°C):
- Light Needs: Place your ginger in bright, indirect ambient shade or a spot that receives gentle morning sun only. Never place ginger in scorching 2:00 PM southern or western direct sun, which bleaches leaves and burns tips. Compare with other shade crops in 10 Best Low Light Balcony Vegetables for Shaded Apartments.
- Moisture: Keep the potting mix consistently damp like a wrung-out sponge, but never saturated in standing water. Learn moisture maintenance in How to Prevent Container Soil Drying Out Fast.
- Wind Protection: Shelter containers from drying balcony gales that tear delicate reed-like foliage.
Step 5: The “Hilling” Secret and Organic Feeding
As your ginger grows into a lush, 2- to 3-foot tall clump of bamboo-like stems:
- You will notice new, pink-tipped rhizomes pushing up through the soil surface.
- Every 4 to 6 weeks, shovel 1 to 2 inches of fresh organic worm castings or rich compost over the expanding rhizome crowns (just like hilling potatoes!). Hilling encourages the rhizomes to grow plumper, thicker, and more tender.
- Feed monthly with a balanced liquid organic seaweed or fish emulsion fertilizer to supply steady potassium and micronutrients.
Balcony Ginger Growth & Care Timeline Matrix
Use this quick-reference table to track your container ginger’s development from winter sprout to autumn harvest:
| Growth Stage | Typical Timeline | Plant Appearance | Sunlight & Temperature | Water & Care Action |
|---|---|---|---|---|
| 1. Pre-Sprouting | Feb – March (Wks 1–3) | Swelling buds & green nubs | Warm indoor spot (75°F / 24°C) | Keep soil lightly damp; heat mat |
| 2. Early Emergence | April – May (Wks 4–8) | Slender spear-like green shoots | Bright indoor window / Balcony | Water when top inch dries |
| 3. Active Vegetative | June – July (Wks 9–16) | Lush 2-3 ft bamboo-like stems | Ambient balcony shade / warm | Monthly feeding + 1st hilling |
| 4. Rhizome Swelling | August – Sept (Wks 17–24) | Thick clumps & pink nubs at base | Warm patio shade (70–85°F) | Deep watering + 2nd hilling |
| 5. Gourmet Harvest | Oct – Nov (Wks 25–32) | Leaves yellow & flop naturally | Cool autumn balcony / indoors | Cease watering; harvest spuds |
Harvesting “Baby Ginger” vs. Mature Storage Ginger
One of the greatest joys when you grow ginger in balcony containers is choosing when and how to harvest:
1. The Continuous “Band-Aid” Harvest (Summer Grazing)
Starting around four months after planting, you don’t even need to dig up the entire pot! Gently brush back the top layer of potting mix near the edge of the container to expose an outer rhizome “finger.” Use clean pruning shears to snip off a 2-inch piece for tonight’s stir-fry or ginger tea, then push the soil back into place. The main plant will heal its wound and continue growing undisturbed!
2. The Gourmet “Baby Ginger” Harvest (Autumn)
Roughly 5 to 7 months after planting (late September or October), harvest tender baby ginger.
- Baby ginger features creamy white flesh with vibrant magenta-pink tips.
- It lacks the tough, fibrous skin of mature ginger, meaning it requires zero peeling. Grate it directly into sauces, freeze whole knobs in freezer bags, or pickle it for gourmet sushi ginger.
3. The Full Mature Harvest (Late Autumn)
If you want thick, pungent ginger that stores for months:
- Wait until late autumn when cooler weather causes the tall green reeds to naturally turn yellow and die back.
- Stop watering completely when leaves begin yellowing to allow rhizomes to cure in the dry soil for 10 days.
- Tip the container over onto a clean tarp, shake out the loose potting mix, and lift out giant clusters of freshly grown ginger!
Horticultural guidelines from the Clemson Cooperative Extension emphasize bringing potted ginger indoors before autumn temperatures drop below 50°F (10°C), as tropical rhizomes suffer chilling injury and rot in cold, waterlogged soil.
For other easy container root and culinary crops, explore our guide on 10 Best Potted Herbs for Apartment Balconies.
Recommended Related Reading 📚
To continue building a productive container garden on your apartment balcony, explore these related guides on our website:
- 🥬 10 Best Low Light Balcony Vegetables for Shaded Apartments – Thriving edible crops for low-sunlight patios.
- 🧪 10 Best Potting Soil for Balcony Vegetables – 5 proven DIY potting mix recipes for container crops.
- 🪴 10 Best Grow Bags for Balcony Vegetables – The ultimate guide to breathable fabric containers.
Frequently Asked Questions About How to Grow Ginger in Balcony Containers
Can I grow ginger on a north-facing balcony with zero direct sun?
Yes! Ginger is one of the very few edible container crops that flourishes on north-facing balconies. It requires bright, indirect ambient sky light and warm summer temperatures, but never needs direct beam sunlight to produce heavy rhizomes.
Can you eat the green leafy stems of balcony ginger?
Yes! The slender green leaves and stems have a mild, pleasant ginger aroma. Snip fresh green leaves with kitchen shears and steep them in boiling water with a spoonful of honey for a soothing, immune-boosting fresh ginger tea.
How do you overwinter a potted ginger plant in an apartment?
In late autumn before freezing weather arrives, bring your ginger container indoors. You can either keep it as an attractive green houseplant in a warm room with light watering, or allow the foliage to die back completely and store the pot dry in a dark closet until warm spring weather returns.
Final Thoughts
Growing fresh, juicy gourmet ginger on an apartment patio is one of the most surprising and satisfying container gardening projects you can undertake. By choosing wide shallow pots, providing warm ambient shade, and keeping potting mix moist and fluffy, you can easily grow ginger in balcony containers and enjoy delicious homegrown spice right outside your door.
Make sure to bookmark this step-by-step guide before shopping for organic seed ginger this spring!
Have you ever tried growing fresh ginger on an apartment balcony? Share your container gardening questions and patio setups in the comments below!