
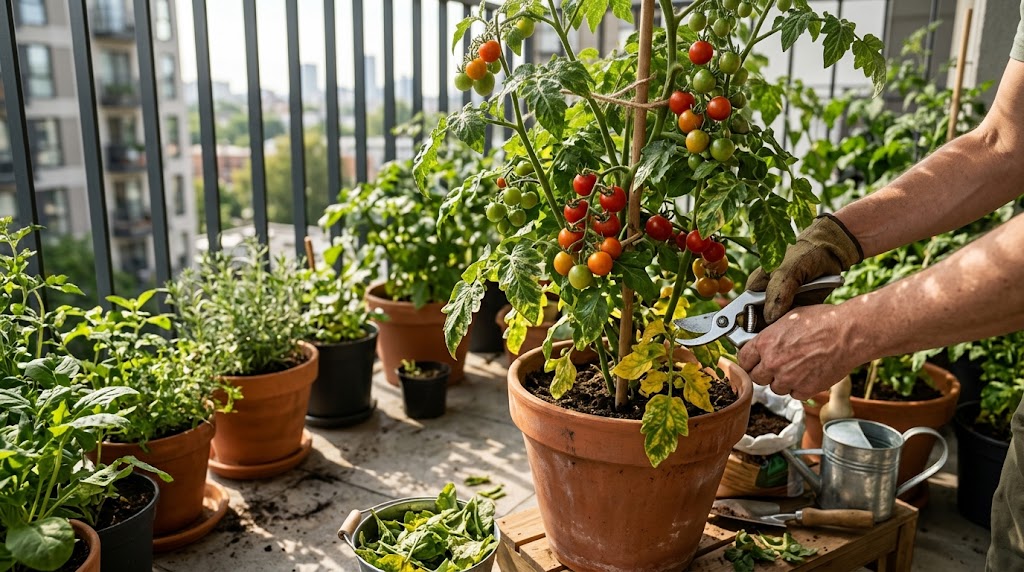
If you want to double your fruit harvest and prevent devastating fungal diseases in tight container spaces, learning the right techniques for pruning balcony tomato plants is an easy, high-reward skill.
When I first started growing container tomatoes on my apartment patio, I assumed that more green leaves and branches would naturally produce more fruit. I let my potted cherry and beefsteak vines grow completely wild. Within eight weeks, my 5-gallon pots turned into an unruly, tangled jungle of giant green foliage that took over half my balcony. The plants looked impressive from a distance, but when I parted the dense leaves, I found very few tomatoes.
Worse yet, because air could not circulate through the crowded stems on my enclosed balcony, early blight and powdery mildew swept through the canopy, turning lower leaves yellow, speckled with brown spots, and mushy.
That painful failure forced me to study tomato physiology. Tomato plants are naturally vigorous, sprawling vines that prioritize producing endless vegetarian foliage rather than ripening fruit.
In a confined container environment, every extra leafy stem competes for limited soil moisture, root space, and fertilizer. By intentionally pruning balcony tomato plants, you direct the plant’s energy away from wasteful vegetative growth and channel it straight into flowering blossoms and swelling fruit clusters. Furthermore, opening up the plant canopy allows sunlight to penetrate deep into the center and provides vital airflow that prevents fungal spores from taking hold.
According to container vegetable research from the University of New Hampshire Extension, selective pruning of indeterminate container tomatoes improves air movement, reduces foliar fungal blights by over 50 percent, and accelerates fruit ripening compared to unpruned vines.
Here is your complete, bookmark-worthy guide to pruning balcony tomato plants.
Why Pruning Balcony Tomato Plants is Essential for Small Spaces
Apartment balconies have enclosed walls, concrete floors, and limited air circulation that create humid microclimates where fungal spores thrive.
Practicing regular pruning balcony tomato plants keeps container vines manageable along railings, prevents heavy branches from snapping in summer windstorms, eliminates soil splash-back infections, and delivers larger, sweeter, and earlier-ripening tomatoes right outside your door.

The Golden Rule: Determinate vs. Indeterminate Tomatoes
Before you make your very first cut, you must know which type of tomato you are growing. Pruning the wrong variety can ruin your entire season’s harvest:
1. Determinate (Bush & Dwarf) Tomatoes: Minimal Pruning Only!
Determinate tomatoes (like ‘Tiny Tim’, ‘Patio Princess’, and ‘Roma’) grow to a genetically predetermined compact height (usually 2 to 4 feet), set all their fruit blossoms on terminal branch tips, and produce their harvest within a concentrated 4-week window.
- ⚠️ WARNING: Never prune the side shoots (suckers) off determinate tomatoes! Pruning suckers off bush varieties removes the exact branches where future flower clusters form, severely reducing your harvest.
- What to Prune: Only remove yellowing, diseased bottom leaves touching the soil line. For compact varieties that need zero sucker pruning, explore our cultivar guide on 10 Best Dwarf Tomatoes for Balcony Containers.
2. Indeterminate (Vining) Tomatoes: Regular Pruning Required!
Indeterminate varieties (like ‘Sweet 100’, ‘Cherokee Purple’, ‘Early Girl’, and ‘Sun Gold’) continue growing, branching, flowering, and setting fruit indefinitely until killed by autumn frost.
- In container pots, indeterminate vines will easily reach 8 to 10 feet tall if left unpruned, rapidly exhausting soil nutrients and collapsing off balcony railings.
- What to Prune: These vines require weekly sucker removal and vertical training to 1 or 2 main central stems.
5 Easy & Proven Steps for Pruning Balcony Tomato Plants
Follow these 5 practical steps to prune your container tomatoes safely and maximize your fruit yields.
Step 1: Sanitize Your Pruning Shears Thoroughly
Tomatoes are highly susceptible to viral and bacterial blights that spread instantly through contaminated blades.
- Wipe your pruning shears or bypass snips with 70% isopropyl rubbing alcohol or dip them in a 10% bleach-water solution before moving between plants.
- Always use sharp, bypass-style shears rather than anvil-style clippers, which crush delicate plant vascular tissue and leave jagged wounds that take twice as long to heal.
Step 2: Clear the 10-Inch “Splash Zone” (Bottom Defoliation)
Most fungal tomato diseases (like early blight and Septoria leaf spot) live naturally in the potting mix. When water drops hit bare soil, fungal spores splash upward onto low-hanging leaves.
- Once your tomato plant reaches 18 inches tall, clip off all lower branches and leaves located within the bottom 10 to 12 inches of the soil line.
- Keep this lower “trunk” completely bare.
- This simple step creates an unbroken airflow channel at the base of the pot and completely eliminates splash-back contamination. If lower leaves are already discolored, check our diagnosis guide on Why Are My Balcony Tomato Leaves Turning Yellow?.
Step 3: Identify and Pinch Out Axillary “Suckers”
Tomato suckers are small secondary shoots that emerge directly in the 45-degree angle “crotch” (axil) between the main central stem and a horizontal leaf branch.
- If left alone, every sucker will grow into a giant competing secondary vine with its own leaves, flowers, and suckers, turning your pot into a tangled mess.
- When Small (Under 2 Inches): Simply grasp the base of the tiny sucker between your thumb and forefinger and snap it cleanly sideways until it pops off. Small wounds heal within hours.
- When Large (Over 3 Inches): Use sterilized pruning shears to snip the sucker at its base, leaving a tiny 1/4-inch stub to avoid tearing the main trunk bark.
Step 4: Train Vines to a Single or Double Leader
In a 5- to 7-gallon container pot, your soil volume can sustainably feed only one or two main growing vines.
- Single Leader (Best for Small Spaces): Remove every single sucker from the bottom to the top, training one solitary thick trunk straight up a sturdy bamboo stake, spiral cage, or vertical balcony railing trellis.
- Double Leader (Best for Wider Pots): Allow the single strong sucker that emerges directly below your first flowering cluster to grow into a second main trunk. Stake both trunks vertically and remove all subsequent suckers along both stems.
Step 5: “Top” the Vines 30 Days Before First Autumn Frost
Toward the end of summer (typically late August or early September), indeterminate vines continue wasting energy producing new yellow flowers that will never have enough warm weeks to ripen into edible fruit before winter arrives.
- Snip off the very top growing tip of the main vine (called “topping” or heading back).
- Clip off any late-season flower clusters that have not yet set marble-sized green fruit.
- This hormonal shock forces the tomato plant to halt vegetative growth and channel 100 percent of its remaining sugars into rapidly swelling and ripening existing green fruit on lower clusters.
Tomato Pruning Strategy Reference Matrix
Use this quick-reference table to guide your pruning routine across the growing season:
| Pruning Action | Target Plant Stage | Tomato Variety Type | Primary Benefit | Risk if Skipped |
|---|---|---|---|---|
| Clearing Splash Zone | 18+ Inches Tall | Both Determinate & Indeterminate | Stops Soil Blight Spores | High Risk of Early Blight |
| Pinching Small Suckers | Weekly in Spring/Summer | Indeterminate Vines Only | Directs Sugars into Fruit | Dense Jungle / Tiny Fruit |
| Single Leader Training | Ongoing All Season | Indeterminate Vines Only | Compact Vertical Growth | Snapped Stems / Wind Tipping |
| Thinning Dense Canopy | Midsummer Peak Heat | Both (Selective Leaves Only) | Maximizes Internal Airflow | Powdery Mildew & Rot |
| Topping Main Vine | 30 Days Before Frost | Indeterminate Vines Only | Speeds Late Fruit Ripening | Unripe Frost-Killed Fruit |
Critical Pruning Mistakes to Avoid on Balcony Containers
To avoid shocking your plants or causing fruit damage, keep these essential rules in mind:
1. Never Prune Leaves That Shade Ripening Fruit (Sunscald Warning)
A common gardening myth claims you must prune off all leaves surrounding green tomatoes so the fruit can “see the sun to turn red.” This is scientifically false!
- Tomatoes ripen in response to temperature (optimal between 68°F and 77°F / 20°C to 25°C) and ethylene gas, not direct sunlight.
- Stripping away canopy leaves exposes green fruit to intense UV rays, causing “sunscald”—white, blistered, leathery patches that ruin fruit flavor. Always leave a protective umbrella of foliage above developing fruit clusters.
2. Never Prune When Foliage is Wet
Never prune early in the morning while morning dew clings to leaves or immediately after a rainstorm. Water droplets carry bacterial and fungal spores directly into fresh pruning cuts. Always wait until midday when leaves are 100% dry and bright sun will quickly callous over pruning wounds.
3. Avoid Removing More Than 25% of Leaves at Once
Pruning removes the plant’s solar panels. Trimming off more than a quarter of total foliage in a single session causes severe root stress, which often triggers blossom drop or physiological leaf rolling.
Horticultural guidelines from the Royal Horticultural Society (RHS) emphasize that pairing strategic pruning with steady container moisture and a high-potassium organic tomato feed every two weeks prevents blossom end rot and fruit cracking in container nightshades.
To boost your plant’s natural pest resistance, pair your pruned vines with varieties from our companion guide on 10 Best Companion Plants for Balcony Tomatoes.
For creating the optimal soil environment beneath your vines, review our recipes in 10 Best Potting Soil for Balcony Vegetables.
Recommended Related Reading 📚
To continue mastering your container tomato harvest on your apartment patio, explore these related guides on our website:
- 🍂 Why Are My Balcony Tomato Leaves Turning Yellow? – Easy diagnoses and quick fixes for tomato leaf problems.
- 🍅 10 Best Dwarf Tomatoes for Balcony Containers – Compact determinate cultivars that require zero sucker pruning.
- 🌿 10 Best Companion Plants for Balcony Tomatoes – Boost fruit flavor and naturally repel garden pests.
Frequently Asked Questions About Pruning Balcony Tomato Plants
Can I grow new tomato plants from pruned suckers?
Yes! Tomato suckers root with astonishing speed. Take a 4- to 6-inch sucker, trim off lower leaves, and place the stem in a glass of water on a bright windowsill. Within 7 to 10 days, strong white roots will form, giving you a 100% free clone to pot up for a late summer harvest!
How often should I check for suckers on balcony tomatoes?
Inspect your indeterminate tomato vines once a week. In warm summer weather, suckers can grow from tiny 1/4-inch buds into 4-inch branches in just five days. Catching them early allows you to snap them off easily with your fingers without using shears.
What should I do if a heavy tomato branch snaps in the wind?
If a fruit-heavy branch partially snaps in high winds, gently splint it back into place using wooden popsicle sticks and soft garden tape. As long as some vascular tissue remains connected, tomato stems heal remarkably well within two weeks.
Final Thoughts
Growing sweet, juicy container tomatoes on an apartment patio is one of the most rewarding gardening experiences in the world. By clearing the bottom splash zone, pinching out competing suckers, and topping vines before autumn, you can easily master pruning balcony tomato plants and enjoy abundant, disease-free harvests all season long.
Make sure to bookmark this pruning guide before stepping out to your balcony with your shears!
Are your container tomatoes determinate or indeterminate vines? Share your pruning questions and balcony patio setups in the comments below!